本着能省一点就省一点,我选择申请Google免费的ssl证书。除了时间短了点,但是可以自动续期嘛~
下面就简单记录一下我的申请流程
获取ACME EABkey以及keyid
首先去Google Cloud开启API
https://console.cloud.google.com/apis/library/publicca.googleapis.com
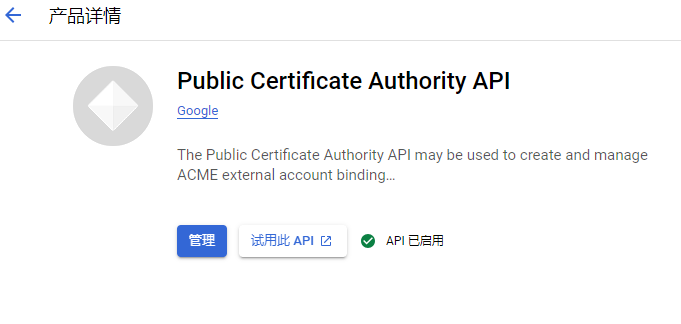
启用后,点击Google Shell输入以下指令申请Key 和Key ID
gcloud beta publicca external-account-keys create得到如下内容
$ gcloud beta publicca external-account-keys create
Created an external account key
[b64MacKey:
M----------------------------------------------------------------------------------g
keyId: 5------------------------------9]
分别是Key与KeyID
使用Certbot获取证书
如果Server没有Certbot,可以先安装
apt install certbot使用Certbot注册账号,输入邮箱、KEYID、KEY
certbot register \
    --email "EMAIL_ADDRESS" \
    --no-eff-email \
    --server "https://dv.acme-v02.api.pki.goog/directory" \
    --eab-kid "KEY_ID" \
    --eab-hmac-key "KEY"
然后同意协议就好了
Saving debug log to /var/log/letsencrypt/letsencrypt.log

- - - - - - - - - - - - - - - - - - - - - - - - - - - - - - - - - - - - - - - -
Please read the Terms of Service at https://pki.goog/GTS-SA.pdf. You must agree
in order to register with the ACME server. Do you agree?
- - - - - - - - - - - - - - - - - - - - - - - - - - - - - - - - - - - - - - - -
(Y)es/(N)o: Y
Account registered.
注册完成后就可以申请证书了,可以申请泛证书或者特定的,自行输入。
执行如下注册指令,域名换成自己的就好
certbot certonly \
    --manual \
    --preferred-challenges "dns-01" \
    --server "https://dv.acme-v02.api.pki.goog/directory" \
    --domains "*.bing0.de"
然后根据他的提示在自己域名商那里或者托管的地方在DNS内添加TXT字段,如下:
Please deploy a DNS TXT record under the name:
----------.bing0.de.
with the following value:
k_--------------------------------------N4
Before continuing, verify the TXT record has been deployed. Depending on the DNS
provider, this may take some time, from a few seconds to multiple minutes. You can
check if it has finished deploying with aid of online tools, such as the Google
Admin Toolbox: https://toolbox.googleapps.com/apps/dig/#TXT/_acme-challenge.bing0.de.
Look for one or more bolded line(s) below the line ';ANSWER'. It should show the
value(s) you've just added.
- - - - - - - - - - - - - - - - - - - - - - - - - - - - - - - - - - - - - - - -
Press Enter to Continue
Successfully received certificate.
Certificate is saved at: /etc/letsencrypt/live/
Key is saved at: /etc/letsencrypt/live/
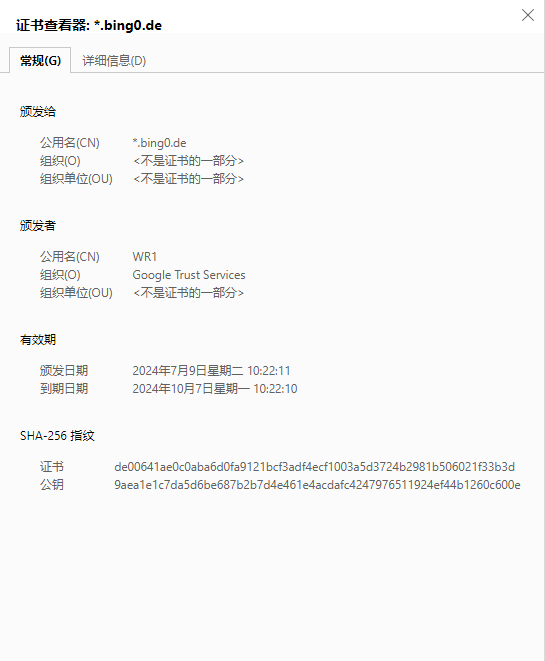
This certificate expires on 2024-10-07.
These files will be updated when the certificate renews.
NEXT STEPS:
- This certificate will not be renewed automatically. Autorenewal of --manual certificates requires the use of an authentication hook script (--manual-auth-hook) but one was not provided. To renew this certificate, repeat this same certbot command before the certificate's expiry date.
- - - - - - - - - - - - - - - - - - - - - - - - - - - - - - - - - - - - - - - -
If you like Certbot, please consider supporting our work by:
* Donating to ISRG / Let's Encrypt: https://letsencrypt.org/donate
* Donating to EFF: https://eff.org/donate-le
- - - - - - - - - - - - - - - - - - - - - - - - - - - - - - - - - - - - - - - -随后你就可以在 /etc/letsencrypt/live/ 找到你的证书了。
至于证书如何使用,那就不说了,不同程序有不同的用法,整体来说就是给出证书路径和密钥路径即可。
更换成功后检查
更换后可以看到如下信息
证书续期
这个证书只有90天的有效期
手动续期有点麻烦
可以去crontab中添加如下信息实现自动续期,可以自己调整运行日期
0 7 * * * /usr/bin/certbot renew --quiet